Automatic Access Token Retrieval in Postman

Postman is a great tool for working with REST APIs, offering a wide range of features, from simple endpoint checks to writing comprehensive API tests. With it, you can mock servers based on requests or create a collection and easily share it with your team.
In modern applications, token-based user authentication is frequently used, which can be somewhat inconvenient.
Typically, users are provided with two tokens: access_token and refresh_token, where the access_token quickly
expires and needs to be refreshed. In such cases, you have to manually perform a request for a new token from another
tab, which significantly slows down your workflow and deteriorates the user experience.
Fortunately, Postman has an excellent mechanism that allows you to fully automate this process.
Postman has a mechanism for executing JavaScript scripts before sending a request, which allows us to perform necessary actions.
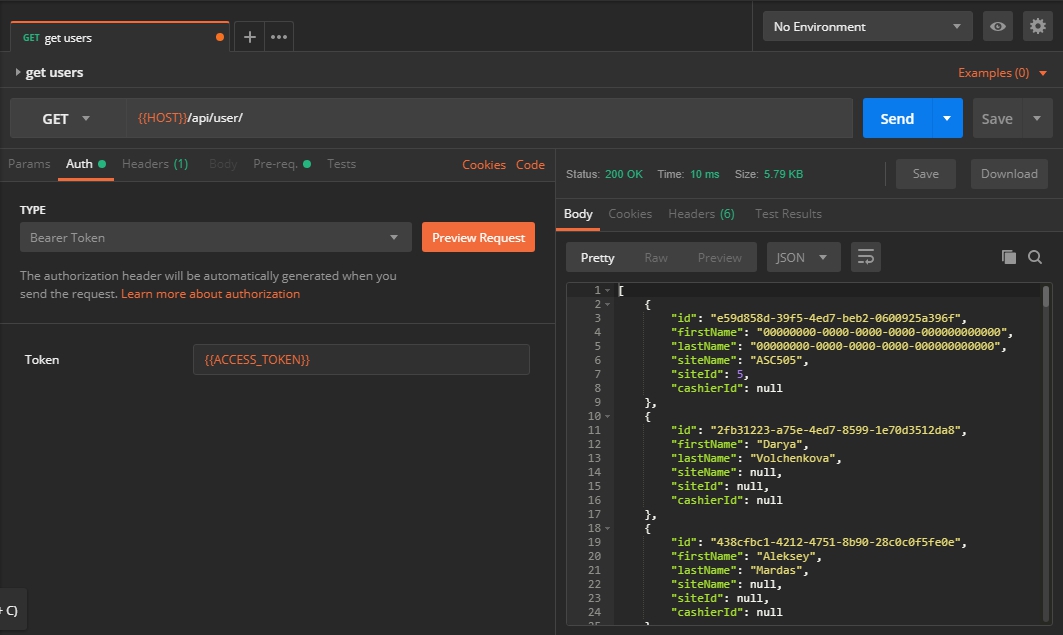
For example, we have an endpoint http://localhost:63001/api/user, and we want to retrieve data from it. However, when
attempting to send the request, we encounter a reasonable error: 401 Unauthorized.
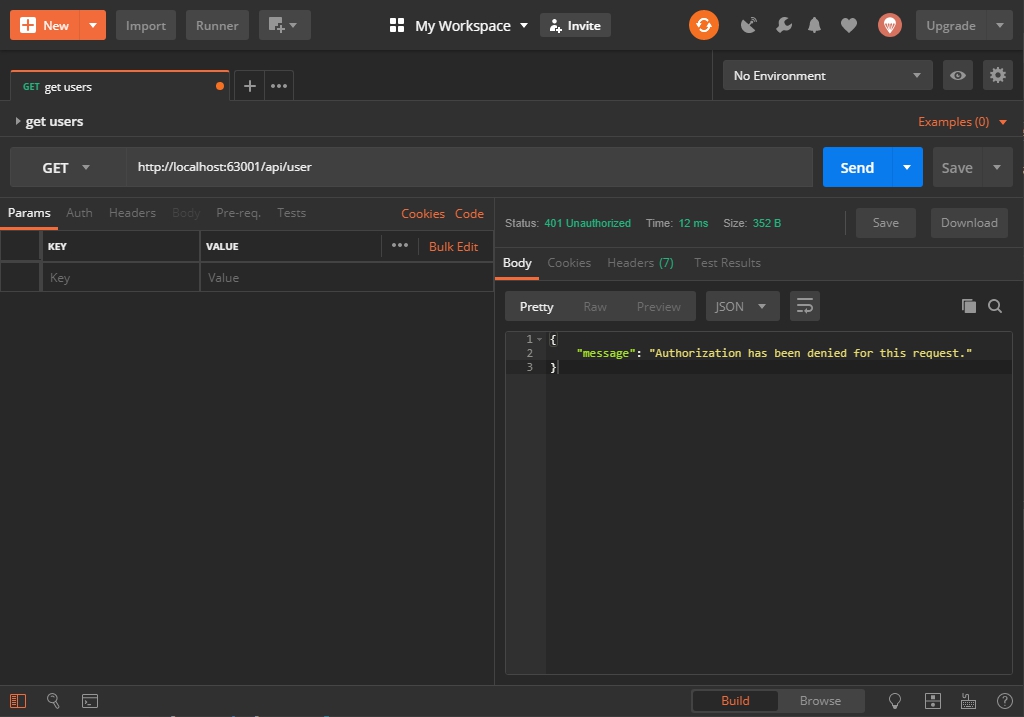
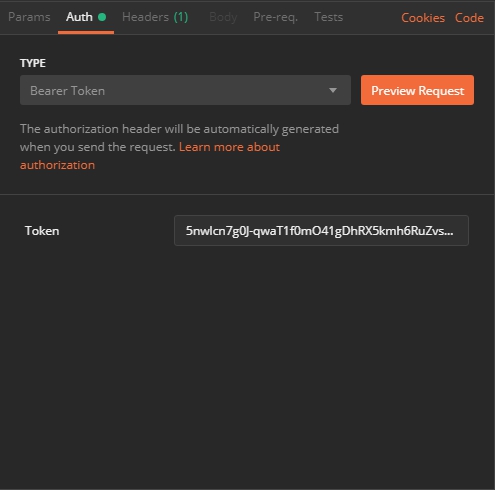
It makes sense since we haven’t included the Authorization header with the token, which in my case is a Bearer token.
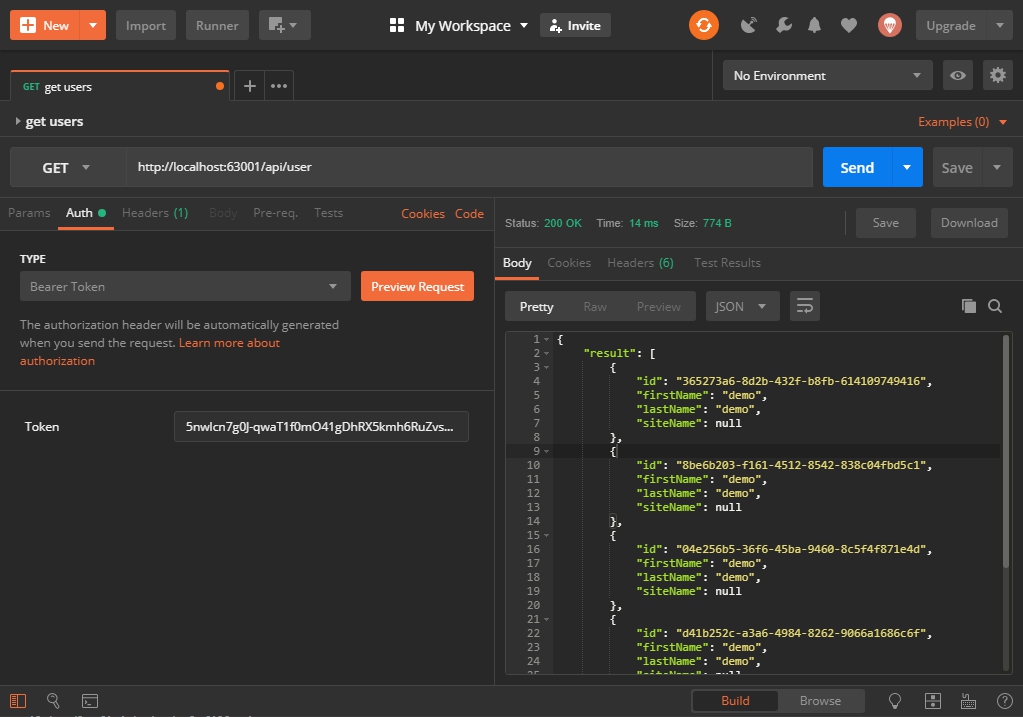
To address this, we set the appropriate authorization method on the Auth tab and fill in the corresponding fields.
And it works:
We checked the data, decided to send another request, and:

Again, we receive a 401 Unauthorized error. Constantly refreshing the token is very inconvenient and tiresome,
especially if the token is valid for only a few minutes.
Fortunately, the solution to this problem is found on the Pre-req tab. By adding the line console.log("Pre-request")
there
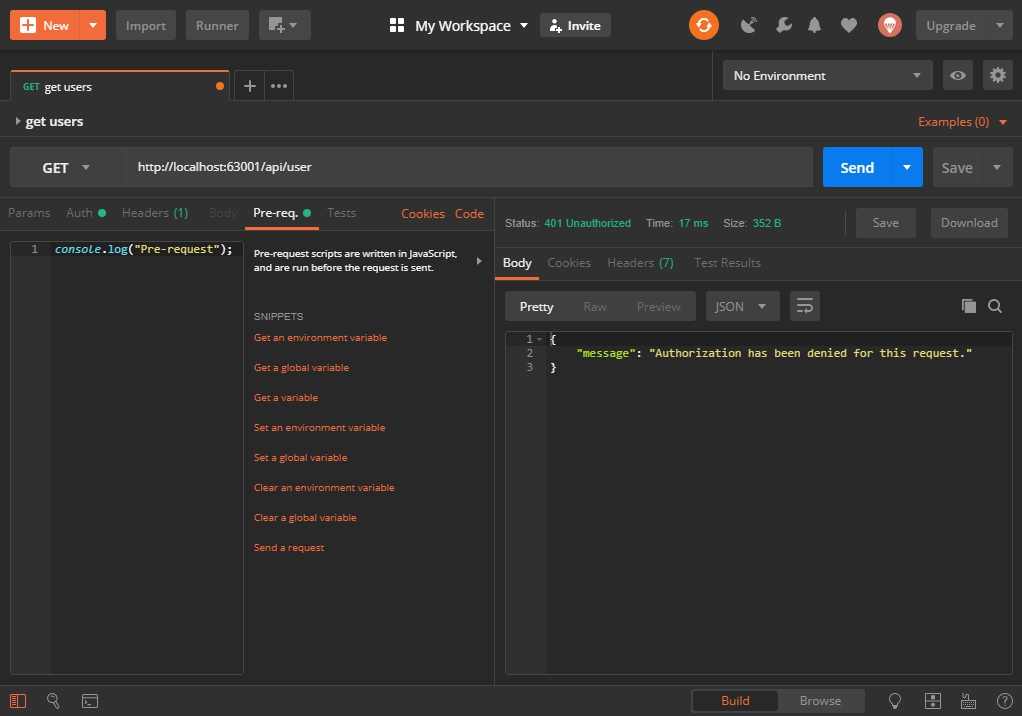
For clarity, open the Postman console by clicking the button at the bottom:

After that, execute the request again, and in the console, you will see that the code we wrote ran before the request was sent.

Thus, we can place code in this block that will retrieve the necessary token for us. Additionally, we can find a snippet for sending a request that will insert the following code.
console.log("Pre-request");
pm.sendRequest("https://postman-echo.com/get", function (err, response) {
    console.log(response.json());
});
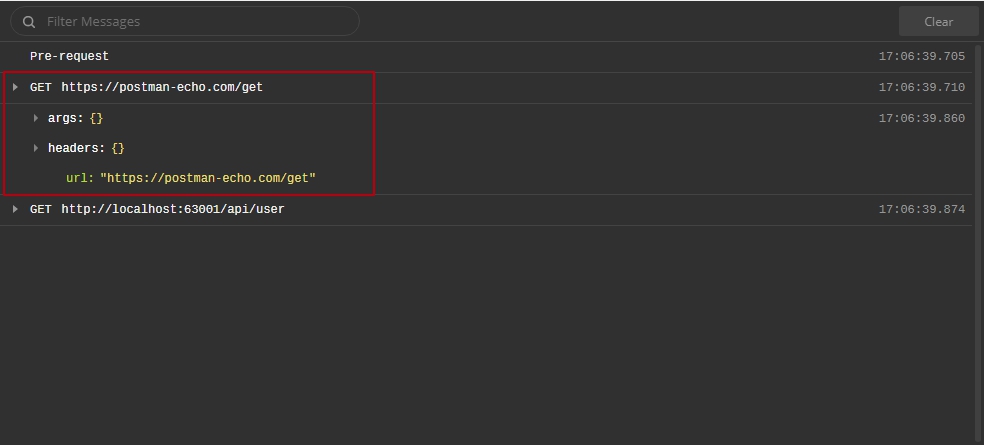
Executing the request with this code in the console, we can see that a GET request to https://postman-echo.com/get
was made before the main request was executed.
Now let’s try writing code that will retrieve the access token:
const request = {
    url: 'http://localhost:63001/api/token',
    method: 'POST',
    header: 'application/x-www-form-urlencoded',
    body: {
        mode: 'formdata',
        formdata: [
            { key: 'grant_type', value: 'password' },
            { key: 'username', value: 'admin' },
            { key: 'password', value: 'password123' }
        ]
    }
};
pm.sendRequest(request, (err, res) => {
    const { access_token } = res.json();
    pm.globals.set('ACCESS_TOKEN', access_token);
    console.log('ACCESS_TOKEN: ${access_token}');
});
As you can see, in the response, we can obtain all the necessary data and set the header directly via pm.request.
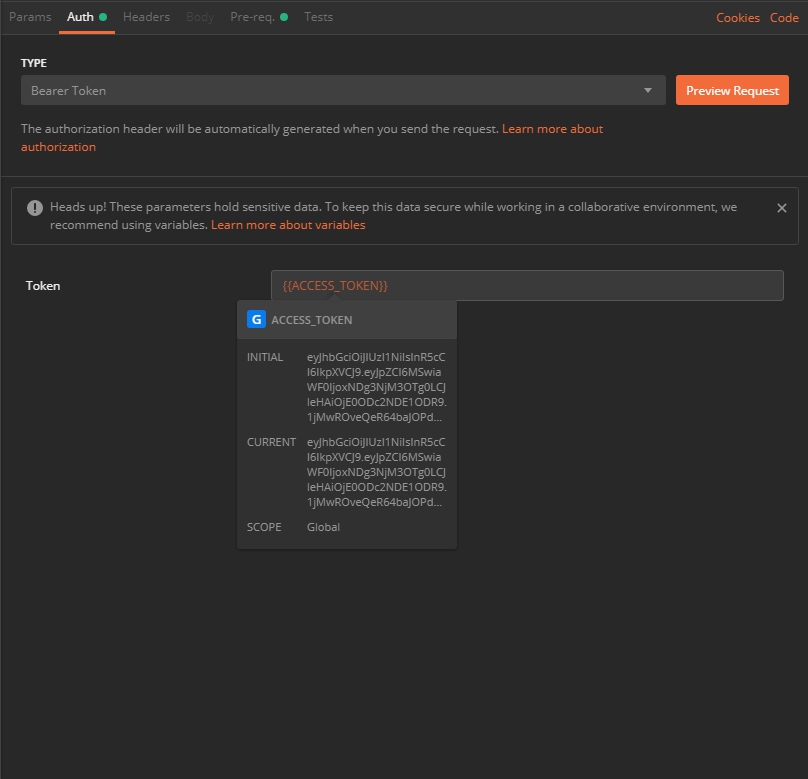
However, Postman provides a more elegant method for this. To implement it, in the line pm.globals.set('ACCESS_TOKEN', access_token);, the global variable ACCESS_TOKEN is
assigned the value of the obtained access token. Then, at any point, we can retrieve this value using the template
literal {{ACCESS_TOKEN}}. For example, by going to the Auth tab and entering {{ACCESS_TOKEN}} instead of the token.
Additionally, when hovering over it, you can even see the original and current values of the variable, if it has already
been defined.
After this, when executing the next request, ACCESS_TOKEN will be defined, and the request will be successful.
However, this code will take significantly longer to execute, as each request will perform an additional authorization
request.
Fortunately, this can be avoided by implementing token validation logic. It also makes sense to store the refresh token and simply refresh the access token when it expires. In this case, we might have three possible states:
ACCESS_TOKENandREFRESH_TOKENare absent, in which case you need to authenticate with the system.ACCESS_TOKENandREFRESH_TOKENare defined, butACCESS_TOKENis invalid, in which case you need to obtain a newACCESS_TOKEN.ACCESS_TOKENandREFRESH_TOKENare defined and valid, in which case no additional actions are required.
To simplify the code, let’s define a few small functions for working with global variables to keep the code clean:
const value = (key, defaultVlue) => pm.globals.get(key) || defaultVlue;
const setValue = (key, value) => pm.globals.set(key, value);
Next, we’ll start by defining a function to send an authorization request and save the result:
const getTimeStamp = (expires_in = 0) => {
    const expiryDate = new Date();
    expiryDate.setSeconds(expiryDate.getSeconds() + expires_in);
    return expiryDate.getTime();
}

const sendRequest = (urlencoded) => {
    const request = {
        url: 'http://localhost:63001/api/token',
        method: 'POST',
        header: {
            'contetn-type': 'application/x-www-form-urlencoded'
        },
        body: { mode: 'urlencoded', urlencoded }
    };
    pm.sendRequest(request, (err, res) => {
        const { access_token, refresh_token, expires_in } = res.json();
        setValue('ACCESS_TOKEN', access_token);
        setValue('REFRESH_TOKEN', refresh_token);
        setValue('ACCESS_TOKEN_EXPIRY', getTimeStamp(expires_in));
    });
}

const sendLoginRequest = () => {
    const username = pm.environment.get('AUTH_USERNAME') || 'admin';
    const password = pm.environment.get('AUTH_PASSWORD') || 'password123';
    console.log('Send login request');
    sendRequest([
        { key: 'grant_type', value: 'password' },
        { key: 'username', value: username },
        { key: 'password', value: password }
    ]);
}
As shown in the code, we additionally save the value ACCESS_TOKEN_EXPIRY. This variable helps determine whether our
token has expired before making a request. To do this, simply add the number of seconds specified in the expires_in
field to the current time.
Note that the values AUTH_USERNAME and AUTH_PASSWORD are not taken from global variables but from environment
variables. This is done for ease of switching users when making a request. You only need to define these variables in
the environment, and you can log in as your user without additional configurations.
Next, let’s consider the case where we already have ACCESS_TOKEN and REFRESH_TOKEN, but the former has expired. For
this, we’ll define another function, sendRefreshTokenRequest:
const sendRefreshTokenRequest = () => {
    const refreshToken = value('REFRESH_TOKEN');
    console.log('Send refresh token request');
    sendRequest([
        { key: 'grant_type', value: 'refresh_token' },
        { key: 'refresh_token', value: refreshToken }
    ]);
}
All that’s left is to apply these functions:
const token = value('ACCESS_TOKEN');
const accessTokenExpiry = value('ACCESS_TOKEN_EXPIRY');

if(!token) {
    sendLoginRequest();
} else if(accessTokenExpiry <= getTimeStamp()) {
    sendRefreshTokenRequest();
}
And finally, everything works. Let’s clear the global variables and run a series of requests to see how our code is executed and where the requests are sent:
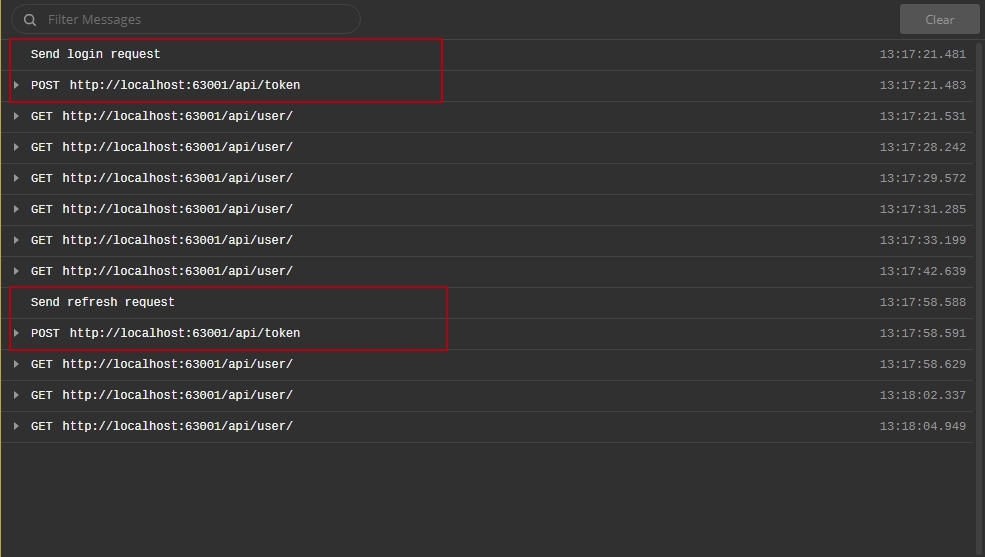
As you can see, the user authorization request is sent first, meaning the sendLoginRequest() method is called. Then, 6
successful GET requests to /api/user follow. After the access token expires, the sendRefreshTokenRequest() method is
called, which refreshes our token pair.
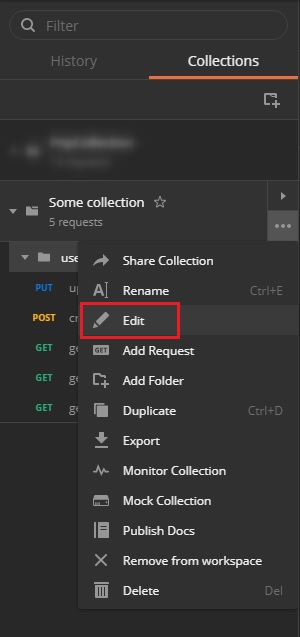
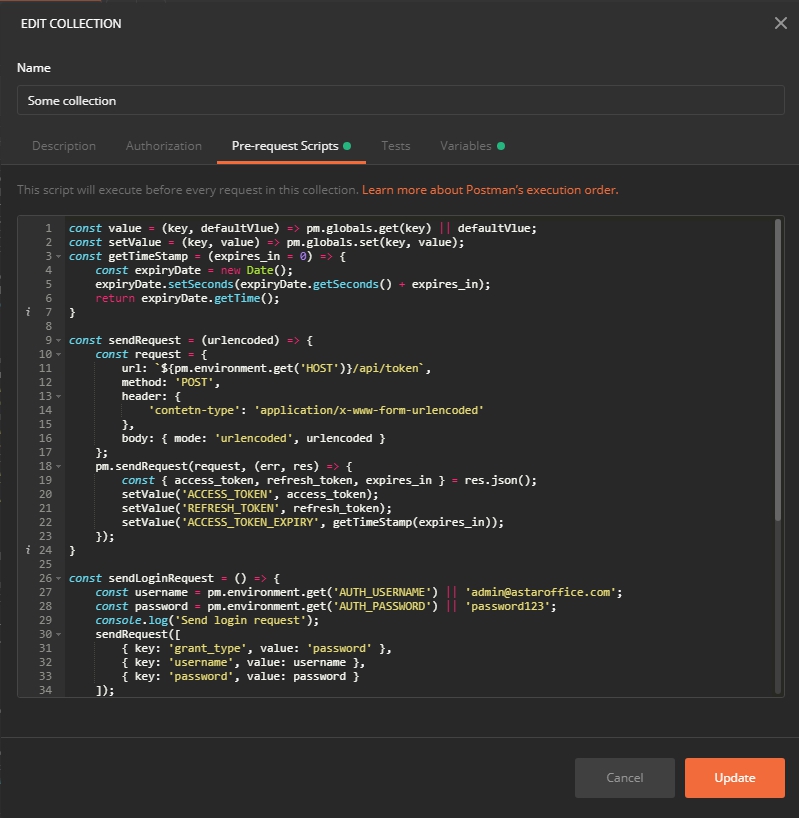
To ensure this code runs for the entire collection, not just for a specific request, open the collection where your request is located for editing.
Move the script you’ve written to the Pre-request Script section. It’s also not ideal to hardcode the URL used for
authorization. A better approach is to add a HOST variable to the environment, where the host URL will be stored. This
can be done on the Variables tab. Then, in the request’s URL field, insert the
construction ${pm.environment.get('HOST')}/api/token.
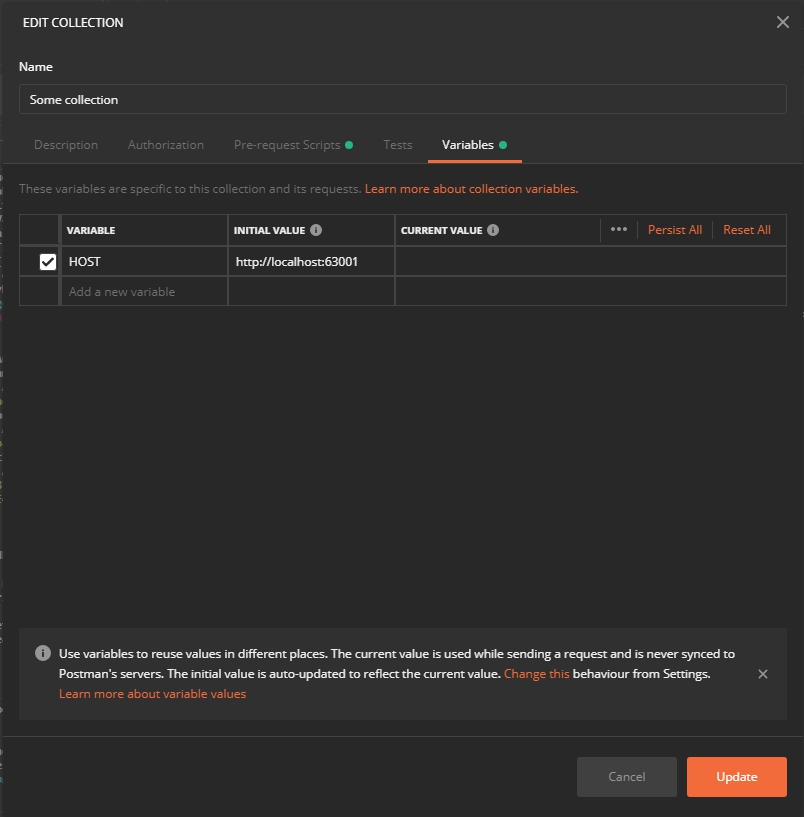
After this, save all the changes. Now you can execute any requests, substituting the {{HOST}} variable in place
of http://localhost:63001, without worrying about authorization. If an endpoint doesn’t require authorization, simply
select the No Auth authorization type.
Full code
const value = (key, defaultVlue) => pm.globals.get(key) || defaultVlue;
const setValue = (key, value) => pm.globals.set(key, value);
const getTimeStamp = (expires_in = 0) => {
    const expiryDate = new Date();
    expiryDate.setSeconds(expiryDate.getSeconds() + expires_in);
    return expiryDate.getTime();
}

const sendRequest = (urlencoded) => {
    const request = {
        url: `${pm.environment.get('HOST')}/api/token`,
        method: 'POST',
        header: {
            'content-type': 'application/x-www-form-urlencoded'
        },
        body: { mode: 'urlencoded', urlencoded }
    };
    pm.sendRequest(request, (err, res) => {
        const { access_token, refresh_token, expires_in } = res.json();
        setValue('ACCESS_TOKEN', access_token);
        setValue('REFRESH_TOKEN', refresh_token);
        setValue('ACCESS_TOKEN_EXPIRY', getTimeStamp(expires_in));
    });
}

const sendLoginRequest = () => {
    const username = pm.environment.get('AUTH_USERNAME') || 'admin';
    const password = pm.environment.get('AUTH_PASSWORD') || 'password123';
    console.log('Send login request');
    sendRequest([
        { key: 'grant_type', value: 'password' },
        { key: 'username', value: username },
        { key: 'password', value: password }
    ]);
}

const sendRefreshTokenRequest = () => {
    const refreshToken = value('REFRESH_TOKEN');
    console.log('Send refresh token request');
    sendRequest([
        { key: 'grant_type', value: 'refresh_token' },
        { key: 'refresh_token', value: refreshToken }
    ]);
}

const token = value('ACCESS_TOKEN');
const accessTokenExpiry = value('ACCESS_TOKEN_EXPIRY');

if(!token) {
    sendLoginRequest();
} else if(accessTokenExpiry <= getTimeStamp()) {
    sendRefreshTokenRequest();
}